This cuff bracelet was created for and inspired by Relics & Artifacts newest challenge…the Heart of Glass challenge. For lots of inspiration and to join in on challenges, be sure to join the Relics & Artifacts tribe on facebook!
(If you’re not familiar with Sandra Evertson’s Relics & Artifacts line, do yourself a favor – check it out now!! ) Another great place to find many of the materials used to create this: Retro Cafe Art. com! That’s like an introduction to THE Art Supply Fairy! She’s REAL!
I had to play around a bit to figure out a way to get this piece together… so I thought it might be a great first tutorial for me to make. If I learned something while creating this piece, maybe you can too ,right? And if you already have the skill set to create it… perhaps you’ll find yourself inspired by the few unconventional materials used in this piece… so here we go- my first tutorial!
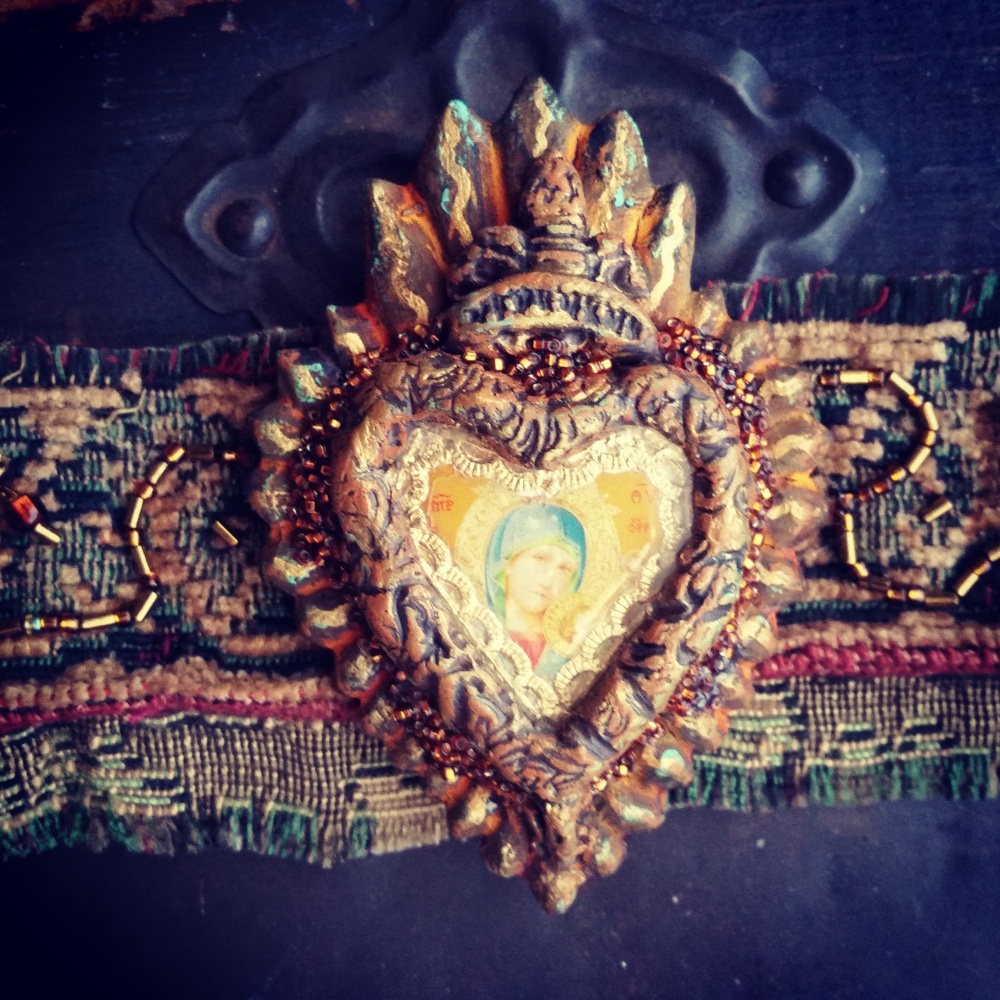
Materials list: Relics &Artifacts heart (Ex Voto I collection), Verday patina paint set , Ave’s Apoxie Sculpt (I used the bronze color but any color will do), Prima Iron Orchid Mould (Baroque 6), Gilder’s Paste in rust, patina and antique gold, gold dresden trim, black craft paint, gold craft paint, seed beads in coordinating colors, Diamond Glaze, E6000, black sharpie marker, velcro, needle and thread, scissors, drill and small drill bit, jeweler’s saw or dremel with carving/cutting bit, and now for the unconventional : an image for the center (I used a sticker), fabric for the cuff (a thrift store purse was used here) and the acrylic lens from a dollar store pair of reading glasses!
STEP ONE: Create a rust finish on the heart using your Verday paint set.
STEP TWO: Make the acrylic heart for the center… hold the lens over the heart and trace the center shape with a sharpie. Cut out the shape with your saw or with a dremel. Using Diamond Glaze, attach the dresden trim around the border on the flip side of the acrylic ( this is so that the lens acts as a window for your image). Next secure your image behind the dresden also with Diamond Glaze. Let dry.
STEP THREE: Place your acrylic heart on the center of the R&A heart . Attach with a small rope of apoxie clay around the acrylic heart. Texturize the clay as desired. Adorn with small bits of clay that have been pressed into the IOD mould . I used the top and bottom detail of the clock on the mould. Let cure.
STEP FOUR: Paint clay pieces with black paint. When dry, finish with rubs of rust, gold, and patina gilder’s paste. Accent with gold paint details as desired.
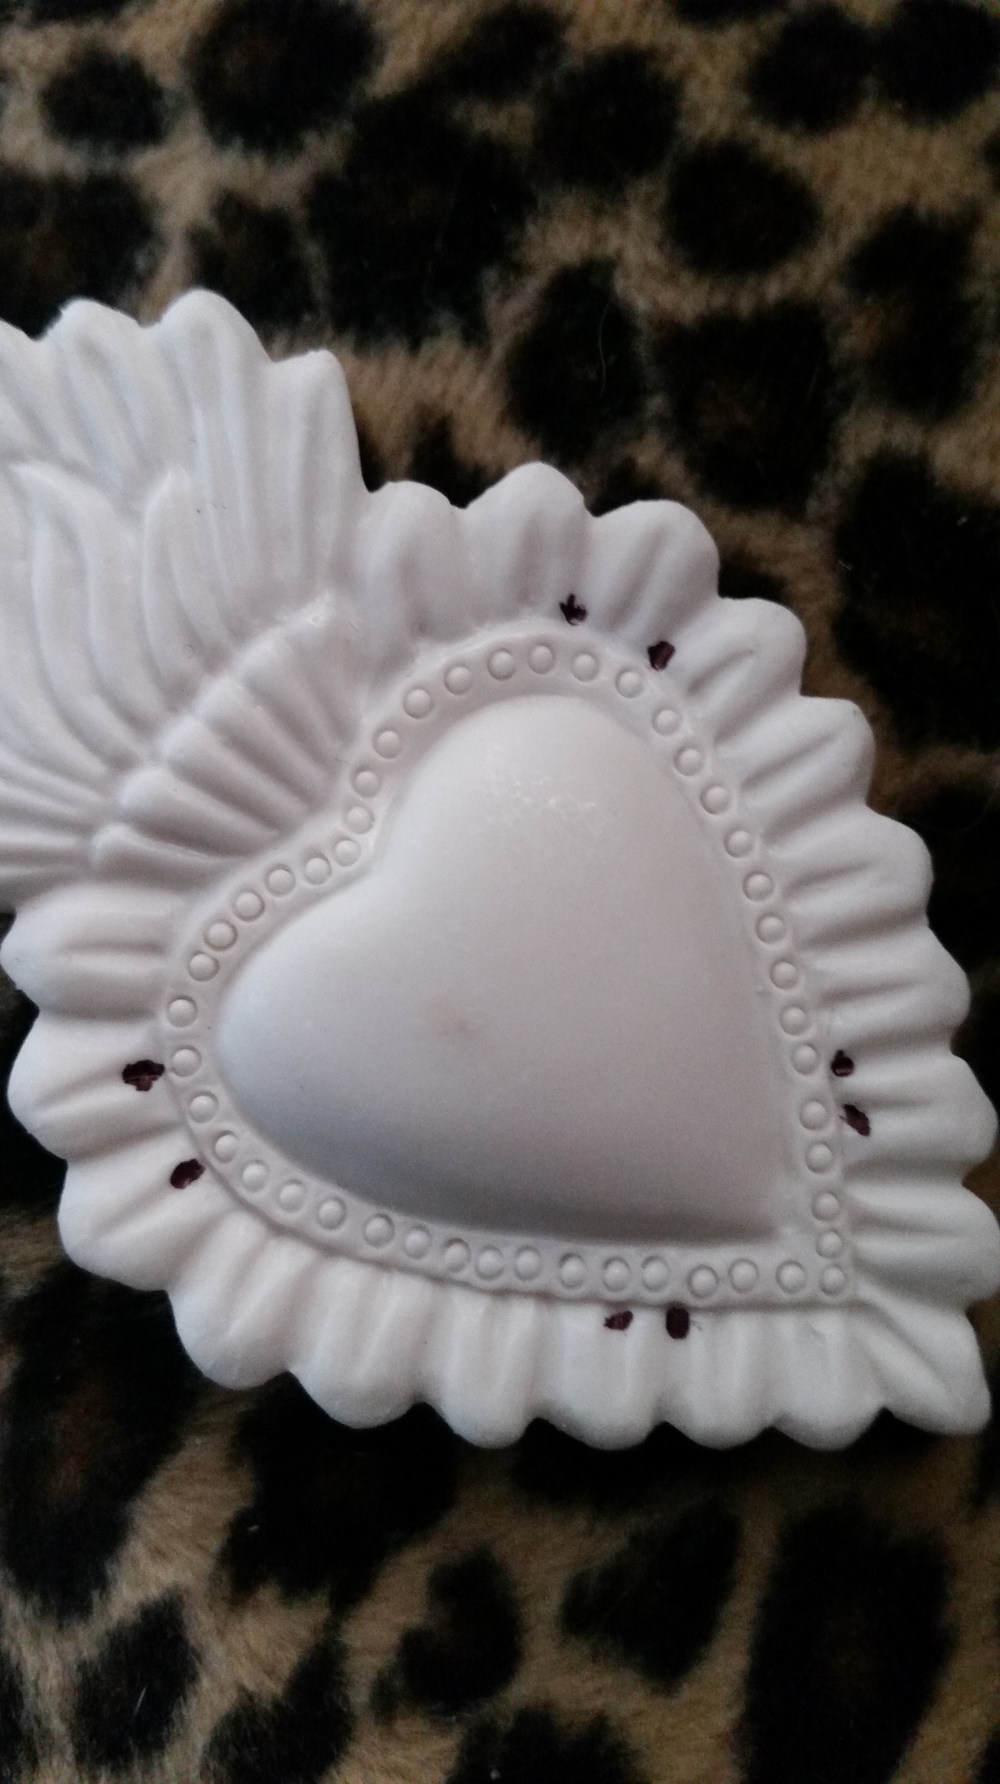
STEP FIVE: Drill “button-holes” on the sides of the clay center. Stitch to strips of fabric in the center. Sew on accent beads and velcro closures. (The photo below demonstrates with black dots where the holes were drilled)
STEP SIX: Cover your drilled holes by running a line of E6000 around the edge and pressing seed beads into the glue.
So there you go! My first tutorial… hope you enjoyed it!! Thank you checking it out…y’all come back now, ya hear?

A fabulous project, clearly and beautifully explained. I love all the detail, texture and warm colours. xx
LikeLike
Thanks Sherry – loved this glimpse into your creative process. I love Apoxie Sculpt!
LikeLike
gorgeous cuff Sherry!! Love love love the unconventional “thrift store” substrate!! I can’t wait to see what comes next!! xo
LikeLike
I love your brains, guts and talents, this is a nice project well explained
LikeLike
Yippppeee! Keep up the great work Sherry! Love your art in all its forms! ❤
LikeLike
Great job and wonderful tutorial!!!
LikeLike
Fabulous tutorial!!! xoxox
LikeLike