I love tile. Talavera tile, pottery tiles, mosaic tiles… well, you get the idea. I wanted to come up with a way to re-create tiles on a smaller scale and with the same artisan feel as the pieces they are inspired by.
Usually when creating a tutorial, I begin with a specific project in mind and take you through the steps on that specific piece. Today, however, I am sharing with you a technique based tutorial, along with several varying projects using that technique to inspire you to make your own!
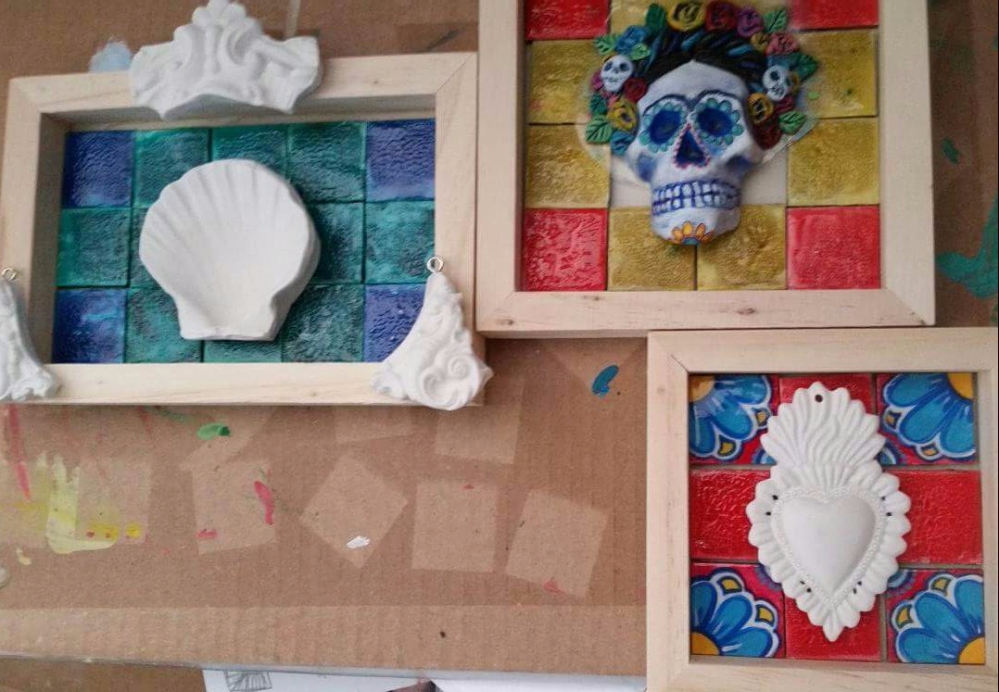
Each of these projects began with masonite squares from Retro Cafe Art and an archival tray (from sandraevertson.com). To create the tiles, I layed several of the masonite squares onto a scrap piece of cardboard . I found it easier to add a bit of masking tape ( sticky side up) to hold tiles in place while working on them. Each tile was gessoed and allowed to dry. Next, I mixed Colorburst powders with Kroma crackle and applied the mix to the tiles using a palette knife.


Accent “tiles” can be created with a simple painted design while you wait on the crackle to dry. The crackle dries to a matte finish. Since I wanted the ceramic look, all the tiles received a gloss coat. I used Triple Thick Gloss glaze, but, a nice layer of resin would work wonderfully as well.


I did a trial run of the tiles in the trays . Once I was pleased with the layout, I played around with Relics & Artifacts resin blanks to give the tiled pieces a focal point.
 ”
”
The trays were painted as desired, the insets were coated with black gesso, and the tiles were adhered using E6000. Each tray was then embellished. Here are some examples:
Frida de los Muertos
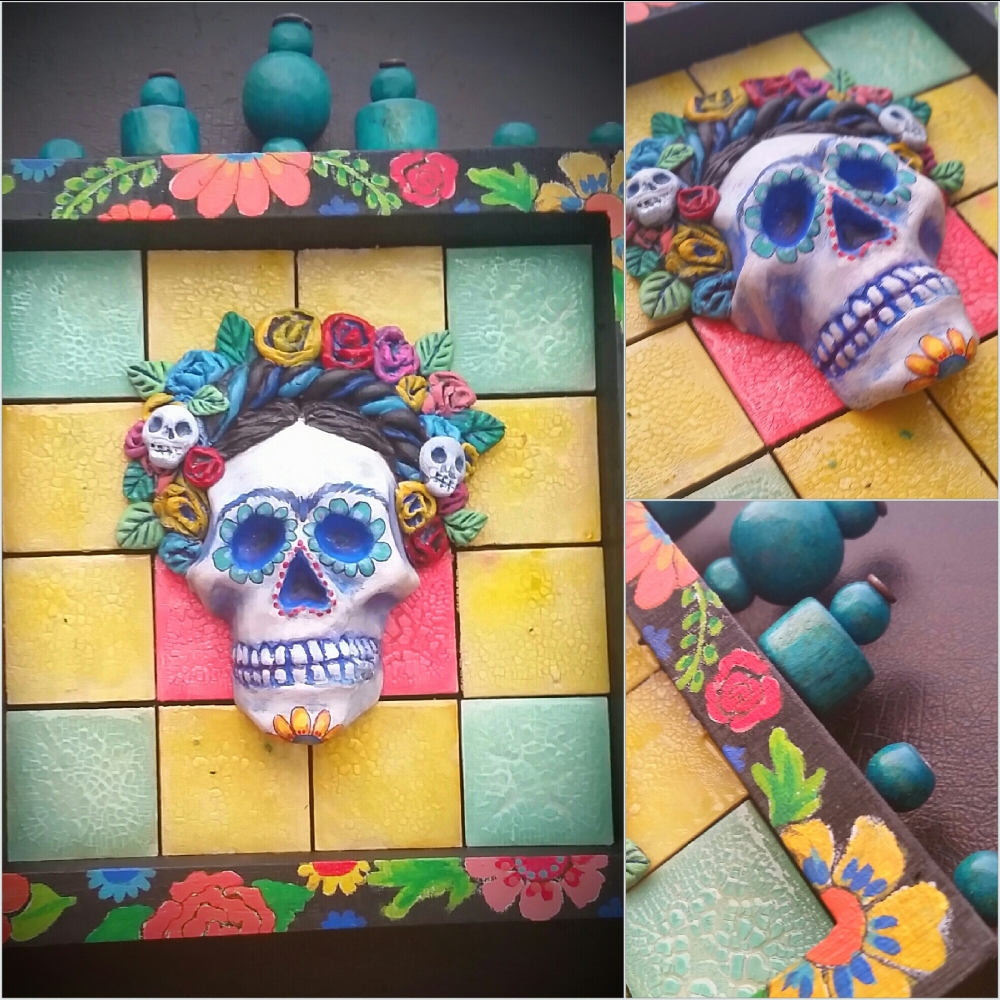
The skull was adorned with Apoxie Sculpt then painted . The tray was simply painted and beads were added at the top.
Purple Prince
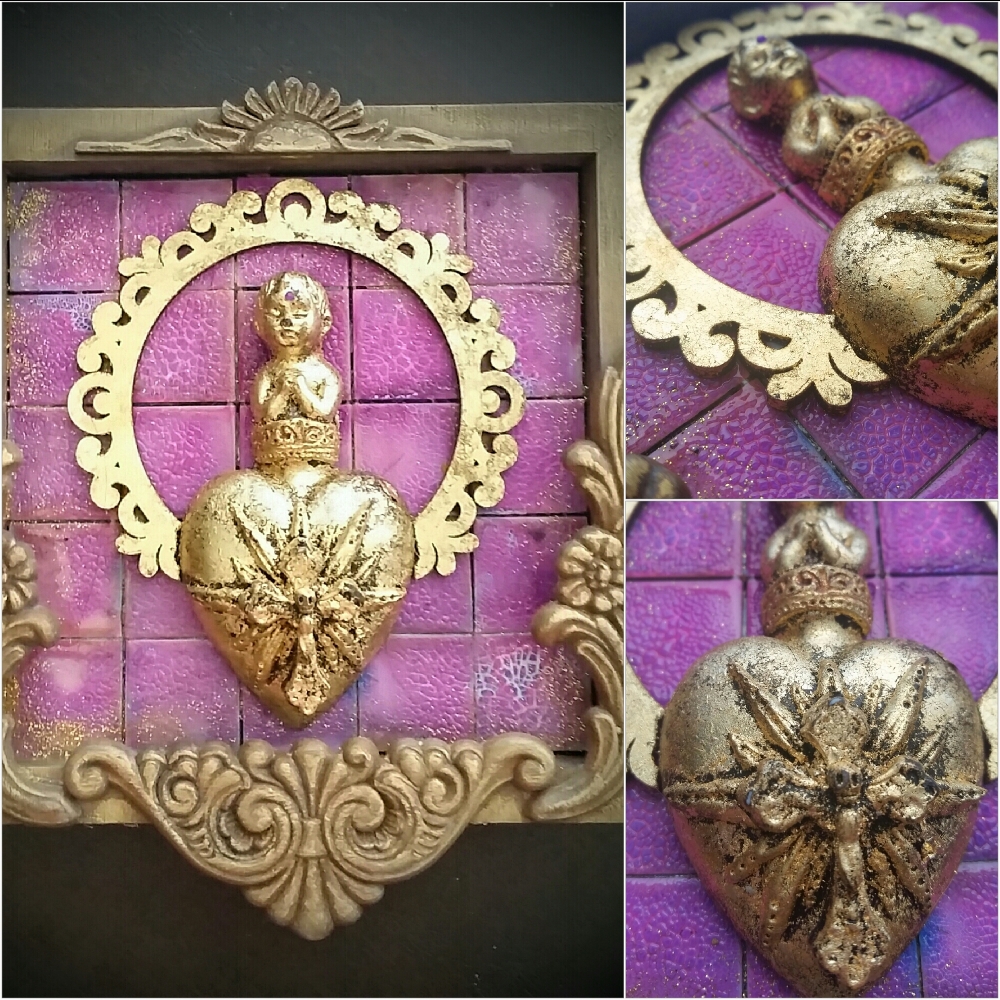
For this piece, I joined a figure ( Milagros set of Relics & Artifacts) to the heart using apoxie sculpt and decorated the heart with more apoxie sculpt and a crosse icon. The focal piece and the frame from a cameo ornament were gilded with gold leaf. Wooden accents, such as the victorian flourish cut-outs were added. They were painted then rubbed with gilder’s paste in antique gold.
Talavera Heart
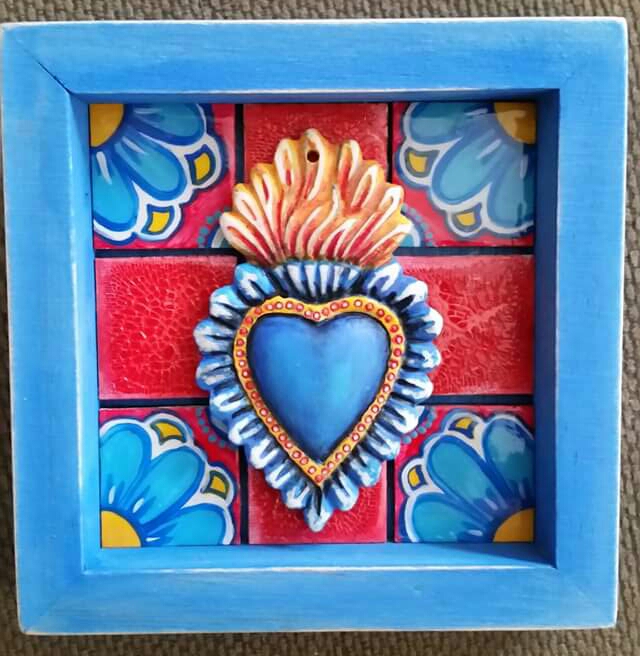
The simplest of all the boxes- the heart and tray were simply painted with acrylics.
Rebirth of Venus
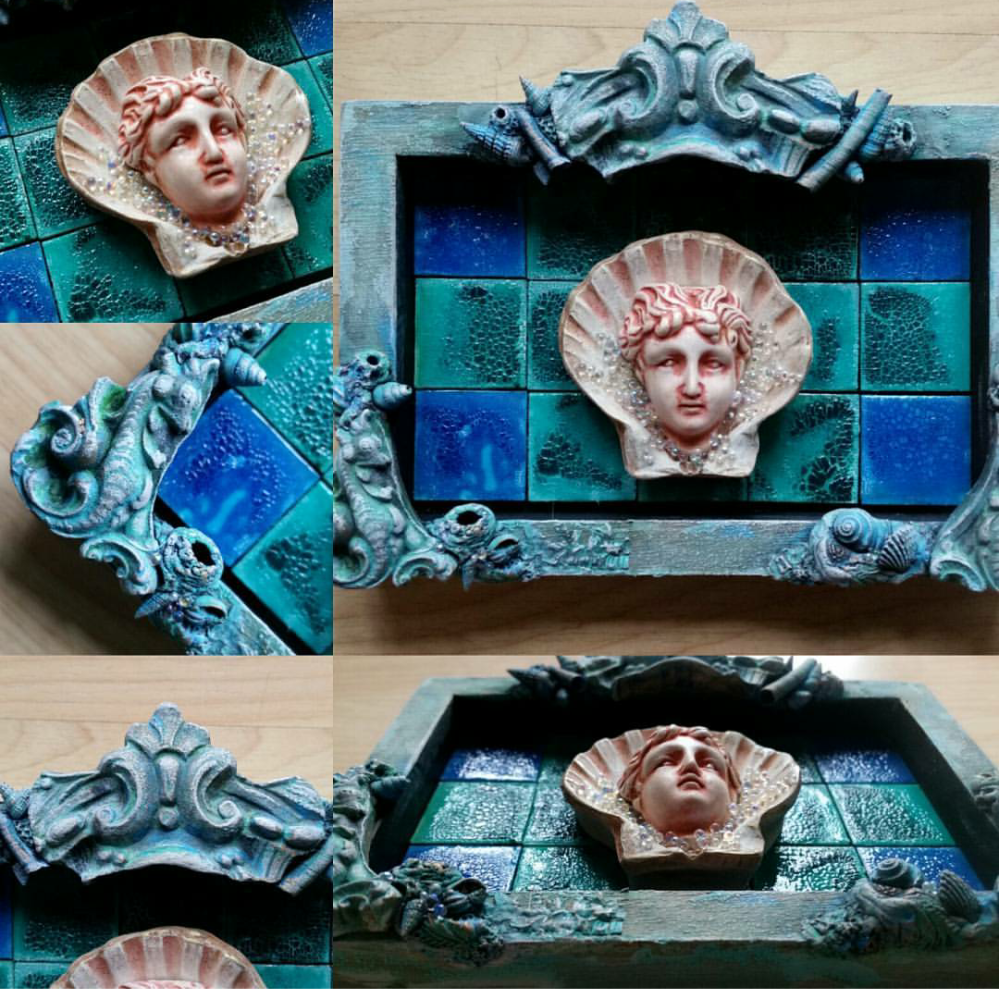
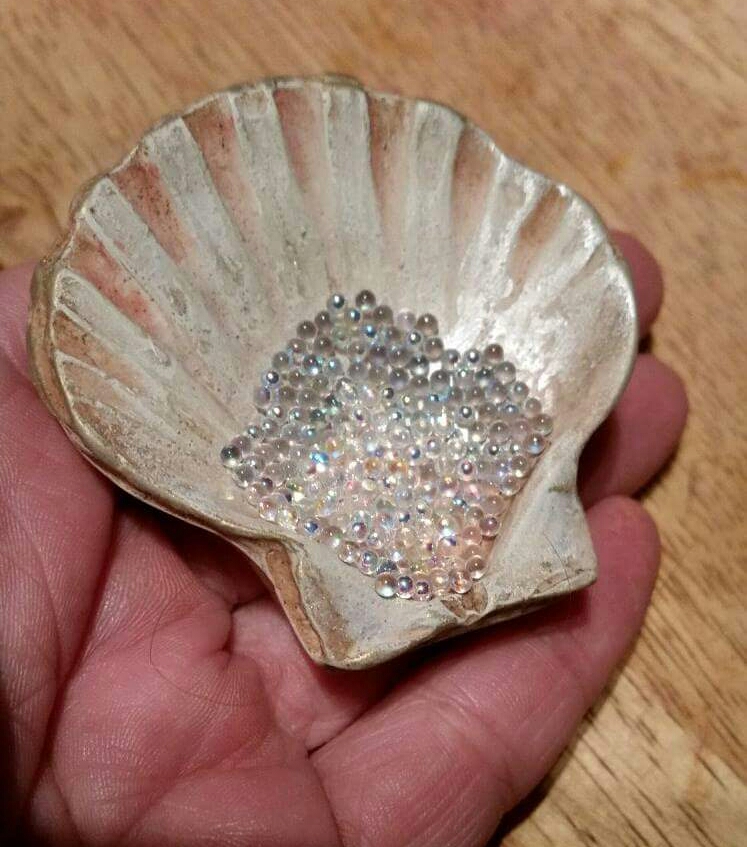
Pieces from the Regalis set and some small shells were glued to the tray, then the tray was painted blue and dry-brushed with cream paint to achieve a cohesive look. For the focal piece, a coquille shell and a piece from Facia Familiaris were painted pink, then dry brushed with cream. The shell was given a coat of E6000 and micro beads were added. The face was glued on top of that.
Thank you so much for checking our my blog! Feel free to leave any questions or comments- and check back soon for more tutorials!
Materials list: ( products available at retrocafeart.com have links provided in the text for your convenience)
For each tray-
Retro Cafe Square Blanks ( 1″, no holes, masonite)
Colorburst Powders
Art Basics gesso, white and black
Archival Trays, Kroma crackle( sandraeverston.com)
E6000, DecoArt acrylics, Deco Art Triple Thick glaze
Frida de los Muertos:
Ancient Soul (Relics & Artifacts)
beads , nails, Apoxie Sculpt
Talavera Heart:
Flaming Hearts Ex Votos II
Purple Prince:
Retro Cafe Layered Cameo Frame Silhouette ornament (reindeer)
Retro Cafe victorian flourish cut-outs
Milagros
Ancient Heart
Crosse Icons
Apoxie Sculpt
gold leaf plus adhesive
decorative wood pieces
DecoArt acrylics
Gilder’s paste, antique gold
Rebirth of Venus:
Coquille
Facia Familiaris
Regalis
Art Ingredients Glass Beads- crystal

Love these!
LikeLike
WOW – thank you – Love this !!!
LikeLike
Amazing results!
LikeLike