What is a tombstone ? It is defined as a large, flat inscribed stone marking a grave or tomb. But, I see it as a doorway of sorts… perhaps signifying an entrance to a world beyond ours. A place which William Cullen Bryant (In Thanatopsis) describes as where we can be ” sustained and soothed by an unfalterable trust- like one who wraps the drapery of his couch about him and lies down to pleasant dreams” , a place where we “join the innumerable caravan of those who’ve gone before us”. Such a place deserves a grand, yet somber, entrance , I would think. ..
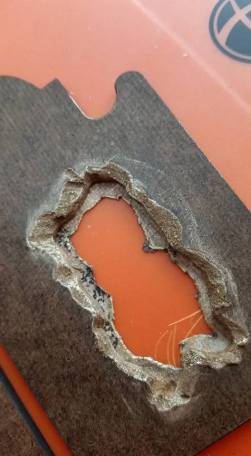
I made my tombstone for the Retro Cafe Art Gallery #2016 Tombstone challenge. Retro Cafe is my absolute favorite art supply shop- links are provided for the various supplies used to create this tomb throughout this post. To begin your tombstone, drill a small hole near where you want your opening to be. Insert the blade of a jeweler’s saw and , once the blade is secured into the handle, cut your opening. Then dremel or or file the edges to rough up that opening somewhat. 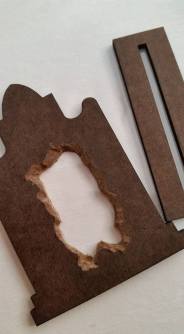
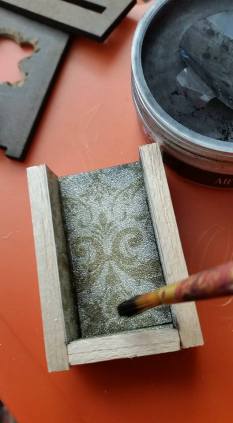
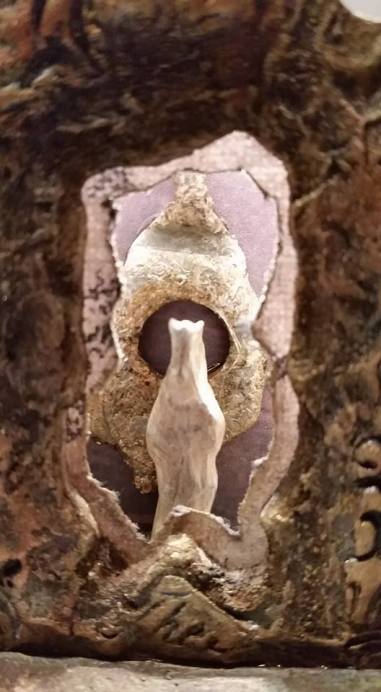
Next build a small box ( 1 x2 inches approx.) or assemble one of the charming tiny shrine boxes from Retro Cafe Art. ( I didn’t have one on hand… so I had to make my own box. I chose to leave the top of the box open to allow more light into the inset) I papered the inset with scrapbook paper and dusted the corners with Prima Memory Hardware artisan powder ( Vasseroux) to add the illusion of depth. I auditioned a few papers before deciding on what I liked. Then I added a small found metal object and a saintly figure from Relics & Artifacts Coquille set . The metal piece was delicately highlighted with german silver gilder’s paste and the figure was dusted with the artisan powder.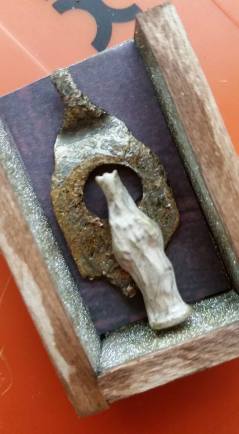
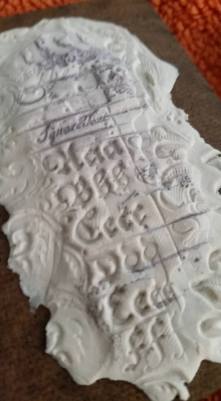
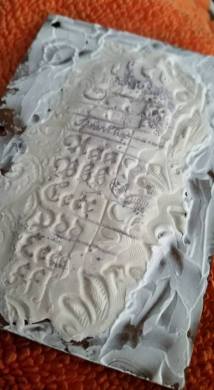
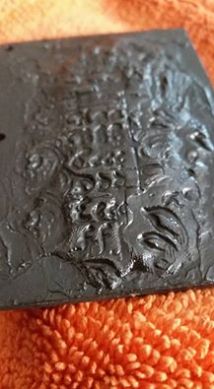
For the front of the tombstone, apply Sculpey clay ( using a touch of Liquid Sculpey to adhere it) . Leave it uneven in thickness and along the edges. Stamp and sculpt texture into the clay as desired. ( A bit of cornstarch brushed onto the stamp can help the clay to not adhere onto the stamp itself.) Bake the piece ( masonite and all) at 275 degrees for 15 minutes. Let cool. Smear modeling paste around the still exposed masonite on the front (& on the tombstone stand) . Let dry. Paint the entire piece with black gesso. Here’s a photo of a sample to see what it should look like, step by step:
To achieve the aged look, dry brush acrylic paint onto the piece. Highlight with gilder’s pastes in patina, rust and gold; dust with artisan powder. Next cut a piece of scrapbook paper for the backside of the inset . Cut ( or tear) a hole into the paper mimicking the opening already there. Adhere to the back side of the tomb front.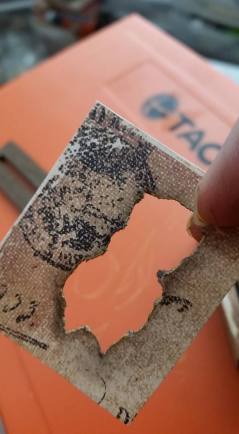
Glue the stand to the tomb and adhere the box onto the backside of the tomb.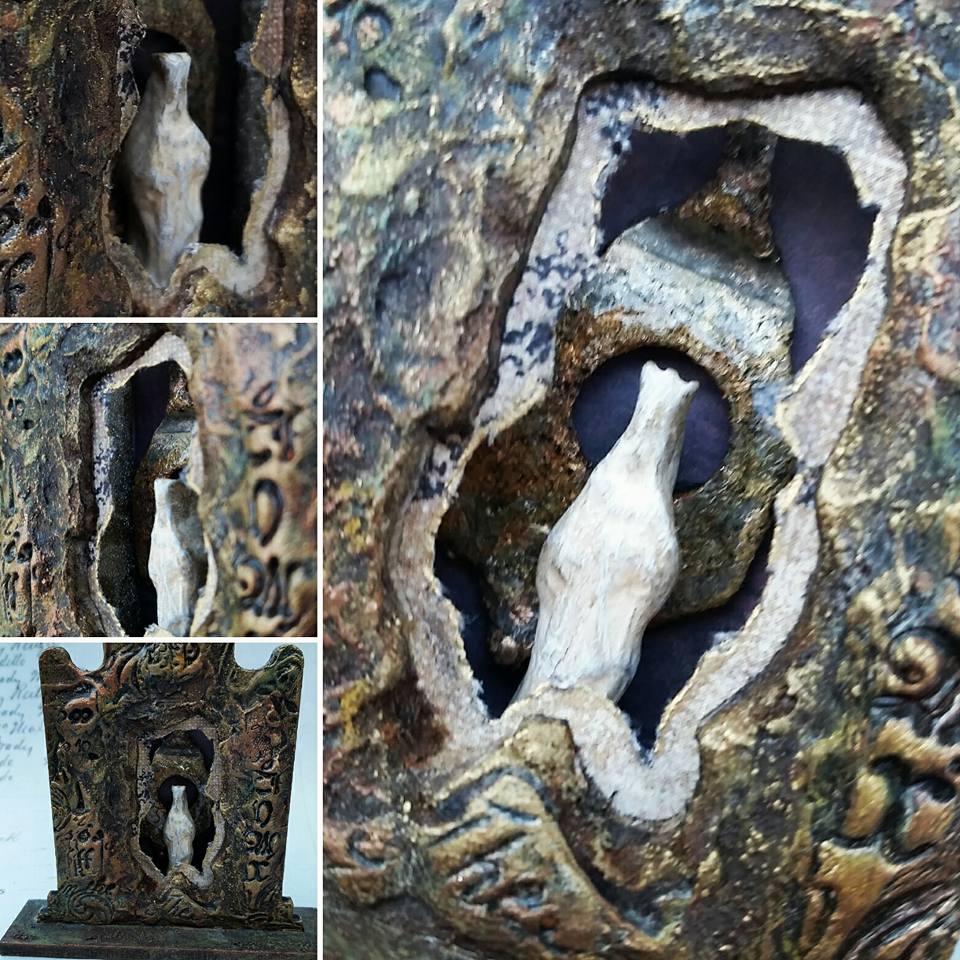
Your piece is now ready for display! Thanks for checking out my tutorial- hope you enjoyed it as much as I did creating it for you! If you create a piece similar to or inspired by this post, please join and share photos on fb in our group, Retro Cafe Art Gallery Inspiration Community and use the hashtag #2016Tombstone! We’d love to see what you create!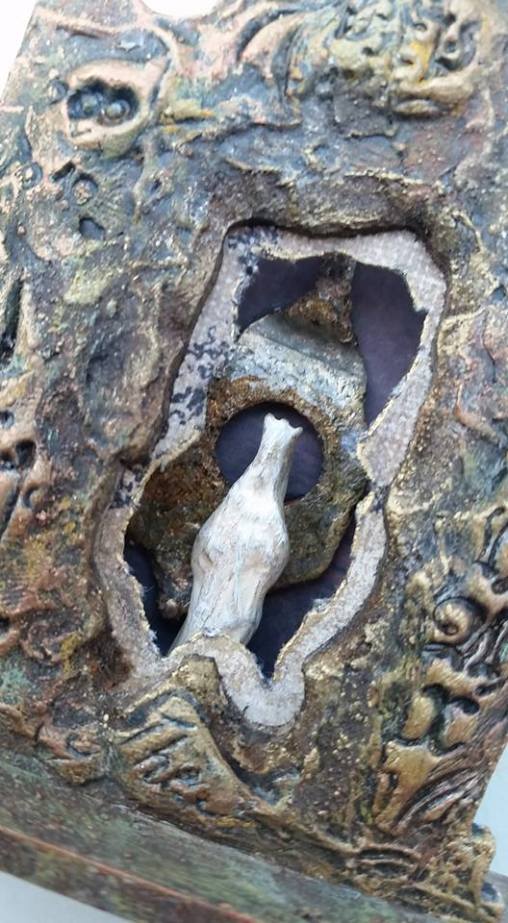

This is an incredible tutorial Sherry!!! I especially love how you used the textured clay! Wonderful!
LikeLike
Sherry!!!! You are freakin amazing!!!!
What a cool make and the way you did it,just blows me away- you are so clever and talented dear friend!!
I hope to use this idea someday, somewhere in my art- thanks so much for sharing!! You rock Sherry!! xo
LikeLike